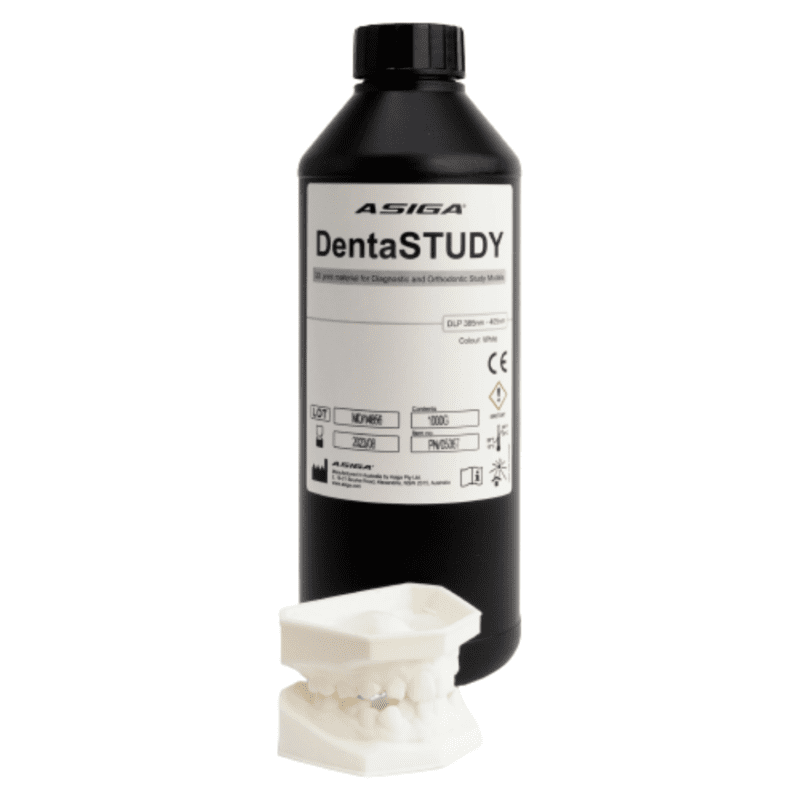
ASIGA DentaSTUDY
$105.00 $175.00
Vibrant white dental model material for diagnostic and study models.
Asiga DentaSTUDY model material was developed with diagnostics in mind. With it is vibrant white colour and high precision, it is perfect for producing digital diagnostic wax-up models, study models, and orthodontic models.
Use this material to help show your patient what their smile could really look like.
*IN STOCK SHIPS NEXT DAY*
Size
Choose Quantity
Product Details
- Use for Diagnostic Wax-up Models, Study Models, Orthodontic Models
- Colour: White
- Printer compatibility: 385nm and 405nm 3D printers.
- Manufactured by Asiga under ISO 13485:2016 & EN ISO 13485:2016
Intended Use:
Asiga DentaSTUDY is intended exclusively for professional dental work. Asiga DentaSTUDY is a 3D print resin intended for the manufacturing of 3D printed orthodontic study models. Asiga DentaSTUDY is not intended for medical use. The study models produced are suitable for dental indications including crown and bridge, study models, orthodontics, and thermoforming applications.
Asiga DentaSTUDY is intended exclusively for professional dental work. Asiga DentaSTUDY is a 3D print resin intended for the manufacturing of 3D printed orthodontic study models. Asiga DentaSTUDY is not intended for medical use. The study models produced are suitable for dental indications including crown and bridge, study models, orthodontics, and thermoforming applications.
Description, Indications & Effects:
Asiga DentaSTUDY is intended to be used in combination with DLP based 3D printers (i.e. Asiga Max Series or Asiga Pro Series) that support Asiga resins. Printer and resin must be optimized with respect to each other in order to produce complete and precise printed parts. If the printer and resin are not optimized with respect to each other this may have an adverse effect on the accuracy and physical quality of printed parts. DLP based 3D printers and post-curing lightboxes make use of a light source to polymerize the Asiga resin. Therefore, operators are advised to wear UV protective glasses when operating a 3D printer and/or lightbox. Differences in colour nuance may occur due to: production in batches; inadequate shaking and mixing of the original packaging before use; inadequate stirring in the DentaSTUDY resin before use; insufficient post-curing.
Asiga DentaSTUDY is intended to be used in combination with DLP based 3D printers (i.e. Asiga Max Series or Asiga Pro Series) that support Asiga resins. Printer and resin must be optimized with respect to each other in order to produce complete and precise printed parts. If the printer and resin are not optimized with respect to each other this may have an adverse effect on the accuracy and physical quality of printed parts. DLP based 3D printers and post-curing lightboxes make use of a light source to polymerize the Asiga resin. Therefore, operators are advised to wear UV protective glasses when operating a 3D printer and/or lightbox. Differences in colour nuance may occur due to: production in batches; inadequate shaking and mixing of the original packaging before use; inadequate stirring in the DentaSTUDY resin before use; insufficient post-curing.
Contra-Indications:
Asiga DentaSTUDY should not be used for any other purpose than as a 3D print resin for the manufacturing of orthodontic study models. Any deviation from this instruction for use may have an adverse effect on the chemical and physical quality of Asiga DentaSTUDY. In case of an allergic reaction, please contact a medical physician.
Asiga DentaSTUDY should not be used for any other purpose than as a 3D print resin for the manufacturing of orthodontic study models. Any deviation from this instruction for use may have an adverse effect on the chemical and physical quality of Asiga DentaSTUDY. In case of an allergic reaction, please contact a medical physician.
Processing & Post-Curing:
Ensure the 3D printer is clean prior to use, including the imaging area and any optical surfaces. Ensure the material tray is clear of solid debris prior to commencing a print. The presence of solid particles in the resin may cause deformation or failure of the printed objects. Nitrile gloves should be worn at all times when handling Asiga liquid resins up until the finishing step. Avoid contact with skin. If contact with skin occurs, wash thoroughly with cold soapy water. If contact with eyes occur, remove any contact lenses and flush with cold water and seek immediate medical assistance.
Ensure the 3D printer is clean prior to use, including the imaging area and any optical surfaces. Ensure the material tray is clear of solid debris prior to commencing a print. The presence of solid particles in the resin may cause deformation or failure of the printed objects. Nitrile gloves should be worn at all times when handling Asiga liquid resins up until the finishing step. Avoid contact with skin. If contact with skin occurs, wash thoroughly with cold soapy water. If contact with eyes occur, remove any contact lenses and flush with cold water and seek immediate medical assistance.
Mixing Before Use:
In Bottle: Agitate/shake bottle vigorously prior to pouring for at least one minute.
In Material Tray: Stir material with a soft spatula. Take care not to damage the film of the Material Tray. This step is necessary to re-disperse the (possible) pigment sediment from the bottom of the vessel. Colour deviation and print failures may occur if insufficiently mixed.
Fill Material Tray:
Ensure the temperature of the resin is between 15 and 30°C / 59 and 86°F and prevent exposure to direct sunlight. Pour the resin into the material tray of the 3D printer.
Ensure the temperature of the resin is between 15 and 30°C / 59 and 86°F and prevent exposure to direct sunlight. Pour the resin into the material tray of the 3D printer.
Washing:
Wash parts in IPA 98%+ pure (Isopropyl alcohol) in a well ventilated area. Best results are achieved when using a pre and post wash. Either steps 1 or 2 can be processed to achieve desired results. Using glass/suitable containers, agitate manually:
- Pre-wash: Agitate in IPA for 5 to 10 minutes.
- Post-wash: Agitate in IPA for 5 to 10 minutes.
Using an ultrasonic cleaning device:
- Pre-wash bath: 5 minutes.
- Post-wash bath: 5 minutes. Important: Ensure a dedicated bath is used for this material. Do not wash in baths that have previously been used for other materials. Allow parts to dry thoroughly before post-curing.
Post-Curing:
1. After washing and drying, let the printed parts rest for at least 10 minutes to ensure the printed parts are free of alcohol residue.
2. Place the printed parts into a UV curing unit for final polymerization for 20 minutes.
3. Asiga Flash post-curing box is suitable. Alternatively, use “NK Optik Otoflash G171” for 2000 flashes.
4. Turn parts over and allow to cool. Cure for a further 2000 flashes. Total: 4000 flashes (2 x 2000 flashes). Post-curing is an UV-light treatment to ensure that DentaORTHO printed parts obtain optimal polymer conversion. Through this the residual monomer is reduced to a minimum and the required mechanical properties are obtained. We advise use of the Asiga Flash post-curing box. Place parts inside the G171 Otoflash chamber on the support mesh, do not use a plastic tray inside the chamber. Inert gas is not required. Please see Asiga Flash Unit user guide.
Storage Conditions, Expiry Date & Transport:
Store the resin in the original packaging at room temperature in a dry, cool and dark area. Close the packaging after each use. The expiry date of the product is mentioned on the product label along with the lot number. Store on printer for up to 4 weeks with hood closed or store in bottle for up to 24 months in a cool dark place. The product performance is no longer guaranteed once the expiry date is exceeded. Do not expose to UV-light. Standard transport conditions apply to this product. There are no restrictions for transport related to hazardous substances.
Store the resin in the original packaging at room temperature in a dry, cool and dark area. Close the packaging after each use. The expiry date of the product is mentioned on the product label along with the lot number. Store on printer for up to 4 weeks with hood closed or store in bottle for up to 24 months in a cool dark place. The product performance is no longer guaranteed once the expiry date is exceeded. Do not expose to UV-light. Standard transport conditions apply to this product. There are no restrictions for transport related to hazardous substances.
Waste Disposal:
Asiga resin in its polymerized form is not environmentally harmful thus can be disposed of in general waste. Asiga resin in its liquid state should be treated as chemical waste. Special disposal requirements are applicable, check with your local, federal, or other regulatory agencies for disposal requirements.
Asiga resin in its polymerized form is not environmentally harmful thus can be disposed of in general waste. Asiga resin in its liquid state should be treated as chemical waste. Special disposal requirements are applicable, check with your local, federal, or other regulatory agencies for disposal requirements.
Delivery Units:
Asiga DentaSTUDY is available in 1 colour only: White, 1kg.
Asiga DentaSTUDY is available in 1 colour only: White, 1kg.

